Gohub aims to make eSIM installation as easy as possible. Here are the primary methods you’ll encounter:
1. QR Code Method #
1.1. For iOS #
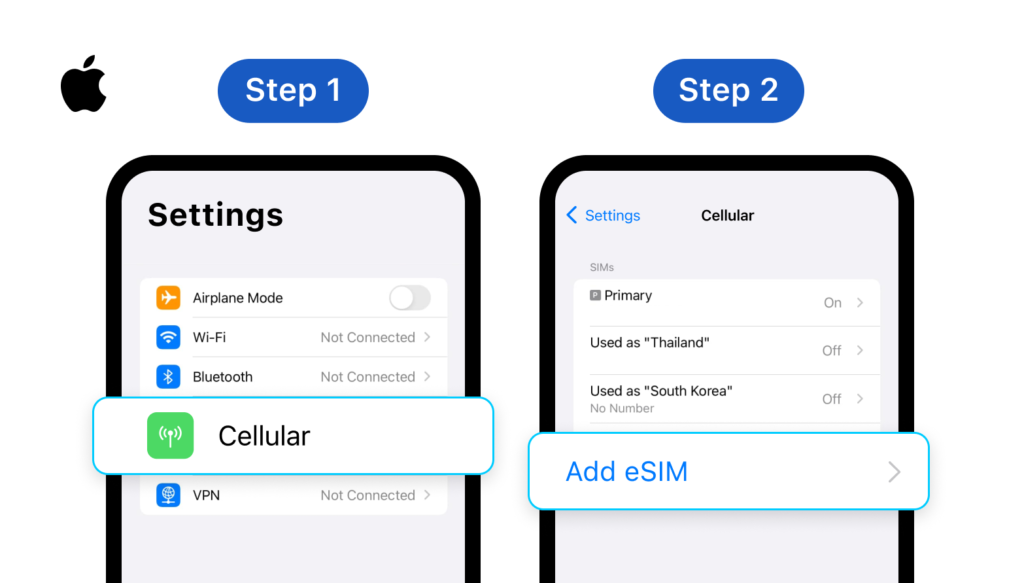
Step 1: Go to Settings > Cellular (or Mobile Data)
Step 2: Choose Add eSIM or Add Cellular Plan
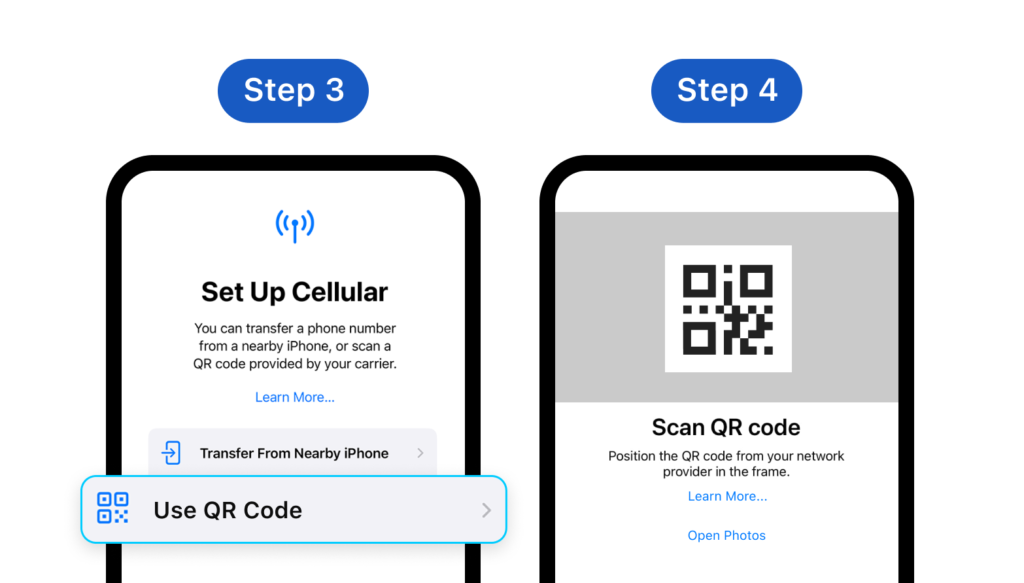
Step 3: Choose Use QR Code
Step 4: Scan the QR code you got from Gohub (or tap Enter Details Manually and enter the activation code if you can not use your device to scan your QR) Besides, you can choose Open Photos to upload the image of QR code
*Note: Only IOS 17 and above allows users to open QR codes from the photos
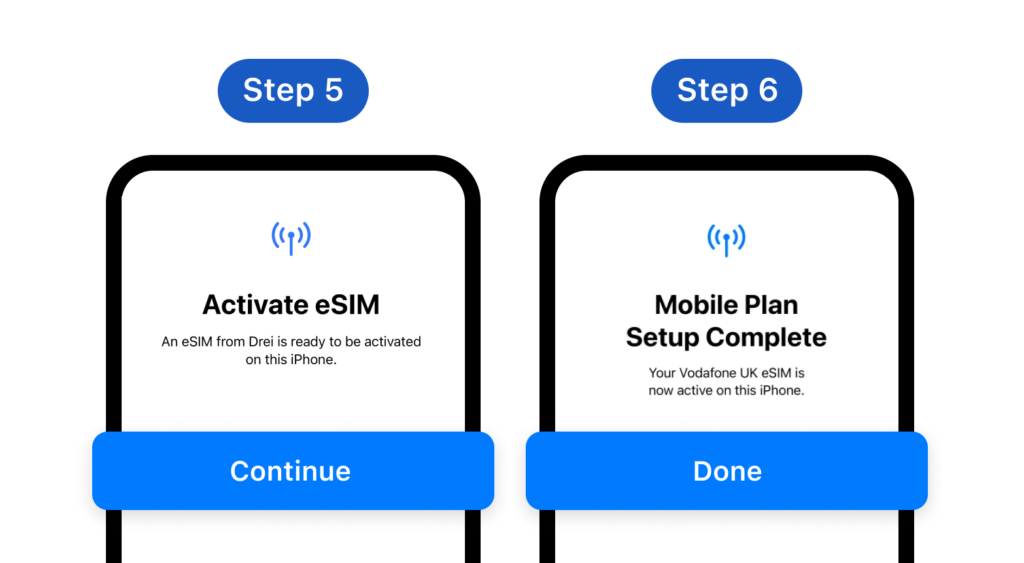
Step 5: Your eSIM is ready to be activated on this device. Tap Continue
Step 6: Your eSIM is now active on this device. Tap Done to finish
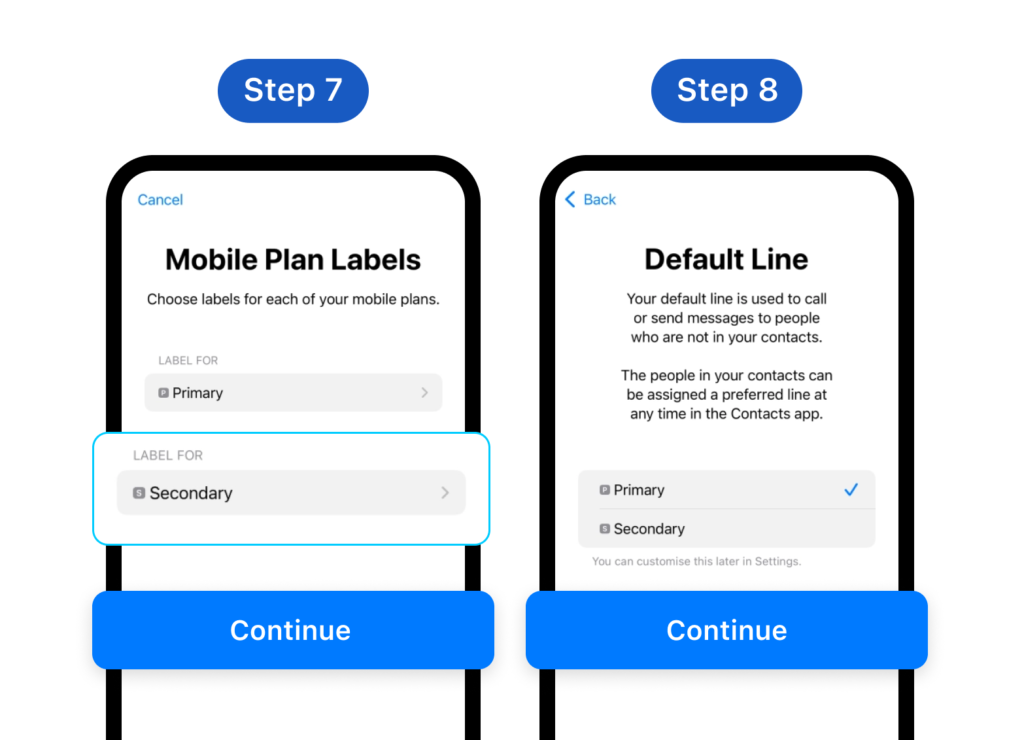
Step 7: In Mobile Plan Labels, you can rename your eSIM to easily manage your data. Then, select Continue
Step 8: Set your default line to call or send messages. Tap Continue
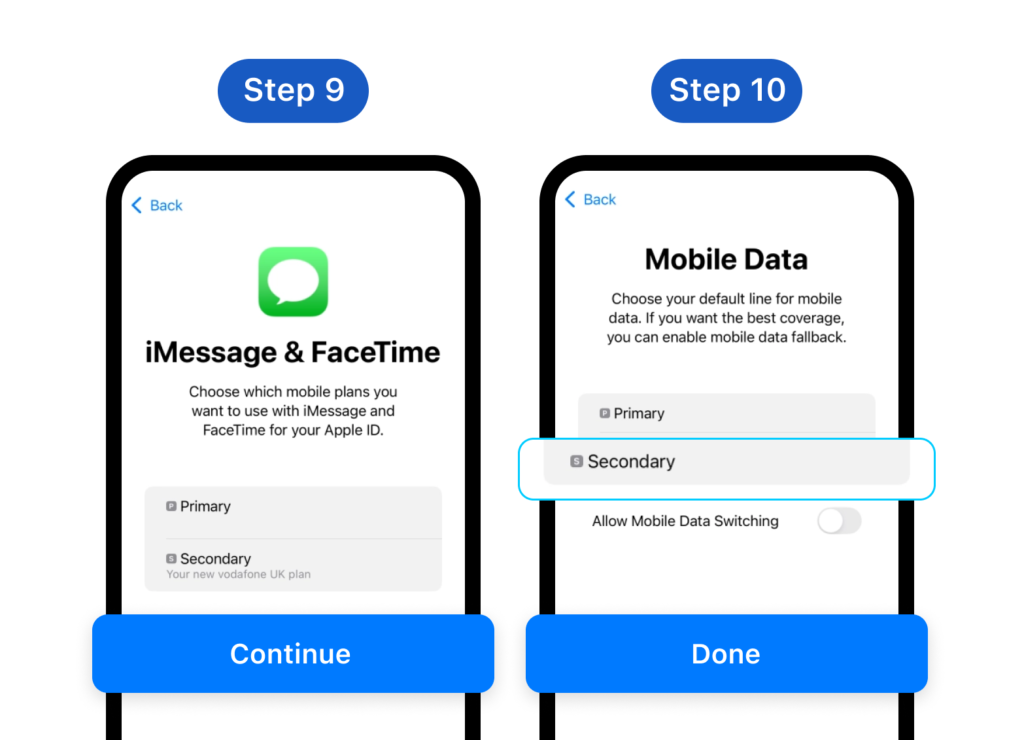
Step 9: Choose the eSIM/SIM you want to use with iMessage and Facetime
Step 10: Choose your default line for mobile data.
*Note: It’s recommended to disable ‘Allow Cellular Data Switching’ to prevent unintended charges on your primary line.
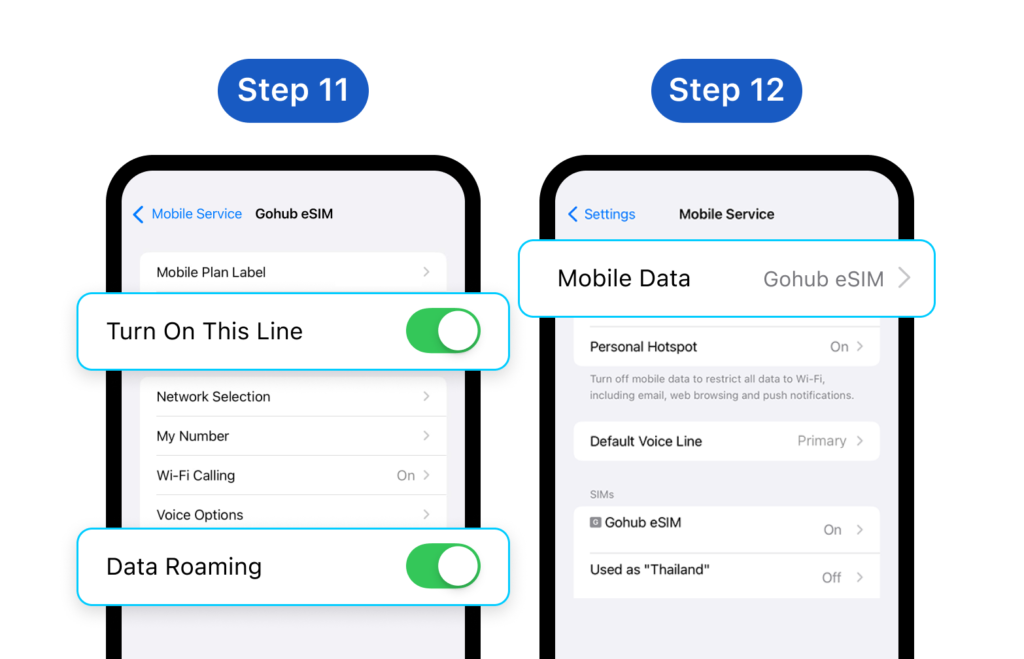
Step 11: Upon arrival at your destination, enable Data Roaming by going to Settings > Mobile Service > Choose your newly added eSIM
Step 12: Turn on Mobile Data to start using the internet by going to Settings > Mobile Service > Mobile Data
*Note: Do not enable Data roaming beforehand to prevent early activation of the eSIM. The period of your eSIM validity will start from the moment you activate it on your device
1.2. For Android #
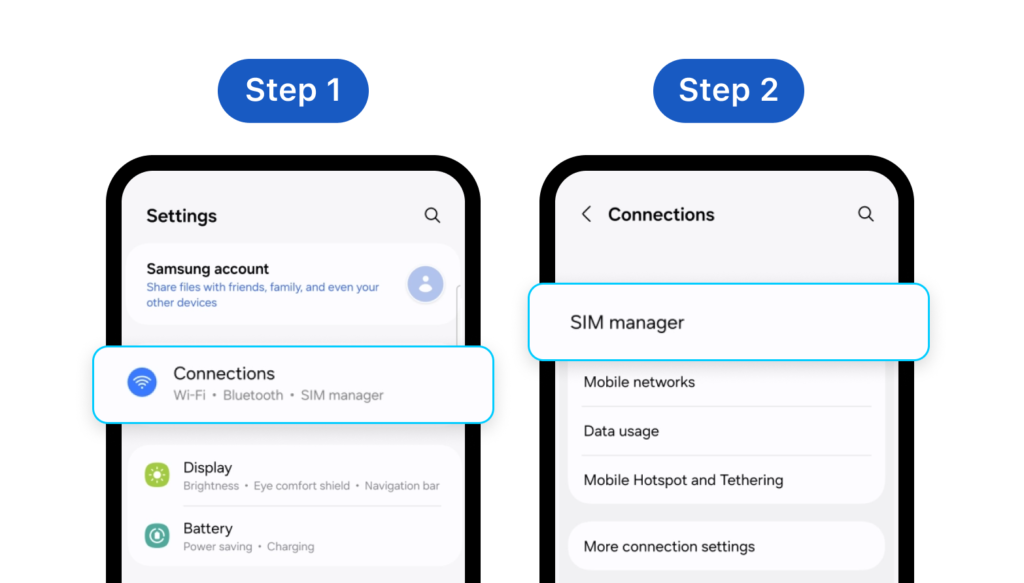
Step 1: Go to Settings > Connections
Step 2: Choose SIM manager
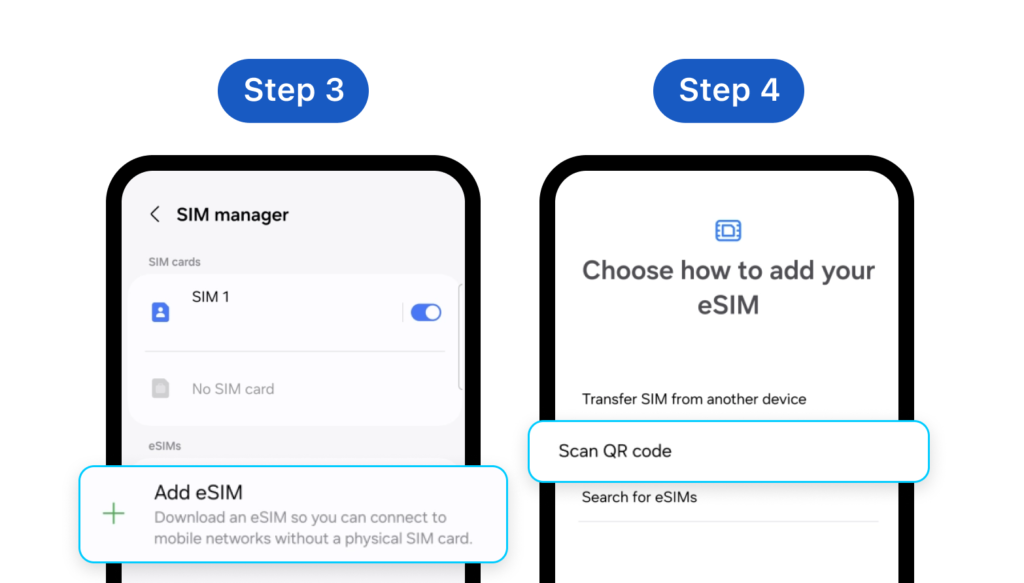
Step 3: Choose Add eSIM
Step 4: Choose Scan QR code
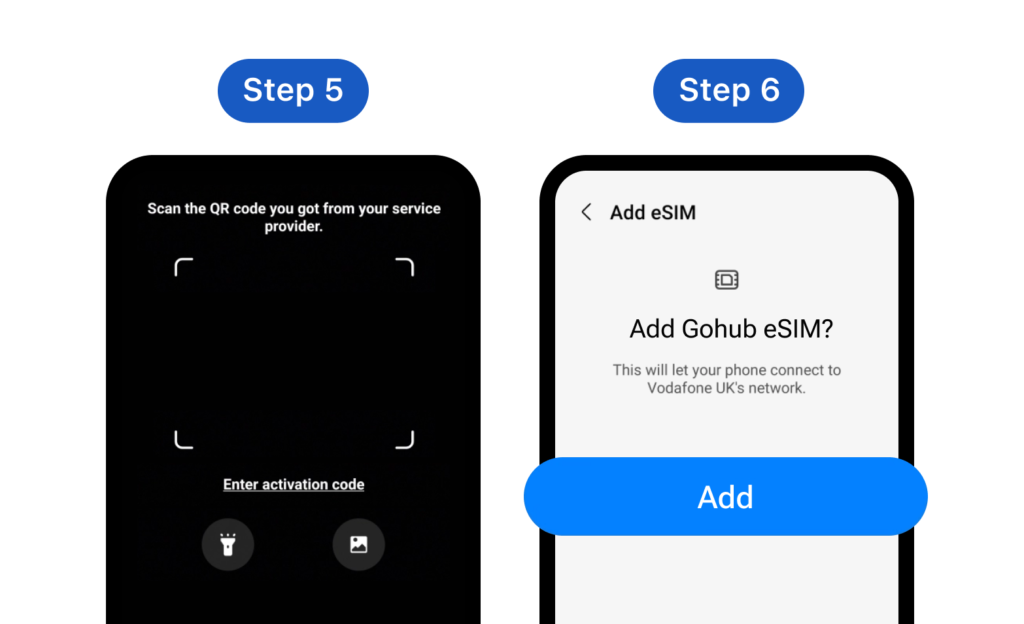
Step 5: Scan the QR code you received from your Gohub email (or tap Enter activation code and enter the activation code if you can not use your device to scan your QR) Besides, you can upload the image of QR code.
*Note: Depending on your Android phone’s version, the QR code image upload feature may or may not be available
Step 6: Tap Add to connect your device to the network
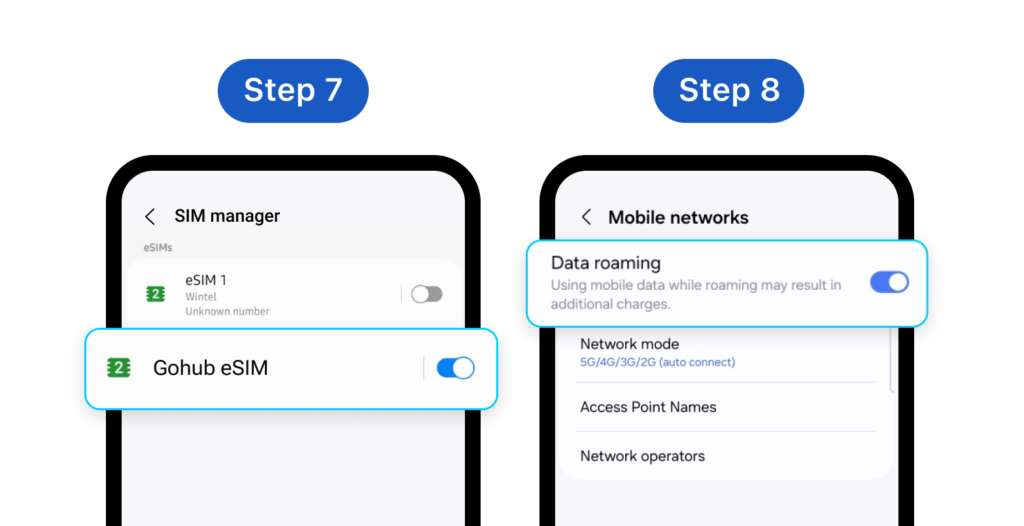
Step 7: Upon arrival at your destination, turn on the eSIM by going to Settings > Connections > SIM manager > Find your newly added eSIM and enable it by toggling the switch on
Step 8: Enable Data roaming by going to Settings > Connections > Mobile networks > Switch Data roaming on
*Note: Do not enable Data roaming beforehand to prevent early activation of the eSIM. The period of your eSIM validity will start from the moment you activate it on your device
2. Gohub App #
For an even simpler experience, Gohub often provides a dedicated app.
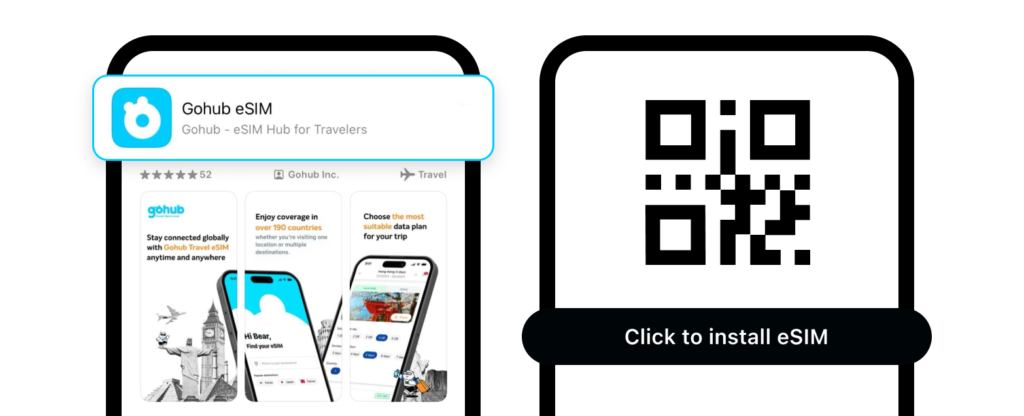
1. Download the Gohub App: Download the Gohub app from your device’s app store (Apple App Store or Google Play Store).
2. Purchase and Activate: If you haven’t already, you can sometimes purchase an eSIM plan directly through the app. The app will then guide you step-by-step through the activation process, which may involve downloading the eSIM profile and configuring your settings.